Arcade cabinet restoration project
24 Feb 2016In days where the “videogame” word sounds old-fashioned and the “video” prefix does not make much sense, nostalgic players have to make a huge effort to get one of those toys of the late 80s and 90s that they spent many coins with.
In this article I briefly describe my experience in a personal project that let me own one of those toys: Building an economical home arcade system with a highly polished professional end result. An idea split into several steps that could be used as a guideline for anyone who wants to have one of these childhood dreams.
This work is dedicated to my partner in life, without whose patient this would have never been achieved. I am grateful also for the constant support of my dear friend Jesús and the daily motivation of my friend Dave.
TL;DR
- How the idea came up
- Setting up the base
- Clearing things out
- Clean-up and carpentry work
- Design
- T-Molding
- Main switcher
- Paint, vinyls and t-molding
- Front doors
- Control panel
- Printed plexiglas
- Speakers
- Monitor
- Fluorescent light fixture
- Raspberry Pi
- Power strip
- Fun!
- Before and after
- More, more and more photos
How the idea came up
Phase 1 of 16
All started in the office, when a friend and I continuously talked about old-school videogames and how cool having our own cabinet would be. Digging on the web, we found sellers from UK, Japan and Spain who had really good machines to send around the world, though the main problem came up quickly: price. Those stores, proud of their custom designs and their product capabilities, asked amounts that were excesive and most of them didn’t really keep the classic cabinet shape and design. Including shipping costs, price became just a swinde.
I managed to find places to buy one in Spain: a provider of original cabinets from the northside and other from the eastside who provided restored and customized cabinets… but with none of both alternatives I was 100% happy: downsides were either the original cabinet was limited to one game and not flexible to add more or the standard-price-restored cabinet was very limited in number of games, screen size, number of buttons and emulation capabilities.
Definitelly it was really expensive getting something closer to our goal. Then we thought of the cheapest option: building our own cabinet (later, maybe too later, I realized it was cheaper in terms of money, but not in time).
My friend directly bought the Project Arcade - Build your own arcade cabinet book. That was indeed an impressive book to build it from scratch… but following the described steps was like studying a project management, electronic and carpentry. In short, something to read when you don’t mind to spend one year to just imagine the machine you want to build and how you could do it when you have a lot of spare time.
I refused that idea and given my space, tools and carpentry knowledge, I thought the wood cabinet building, was something I had to skip. Therefore an empty machine was all I needed. Namely, a second-hand cabinet I could clean and use as a base to build my dream game provider.
My friend, changed his mind and also started to look for one (in Ireland). In a few days found a second-hand one by 50 euros. Yes, just 50!. A functional machine that only had the coins system to fix. Then I thought whether that was possible, there should be more bargains like that waiting for me.
Setting up the base
Phase 2 of 16
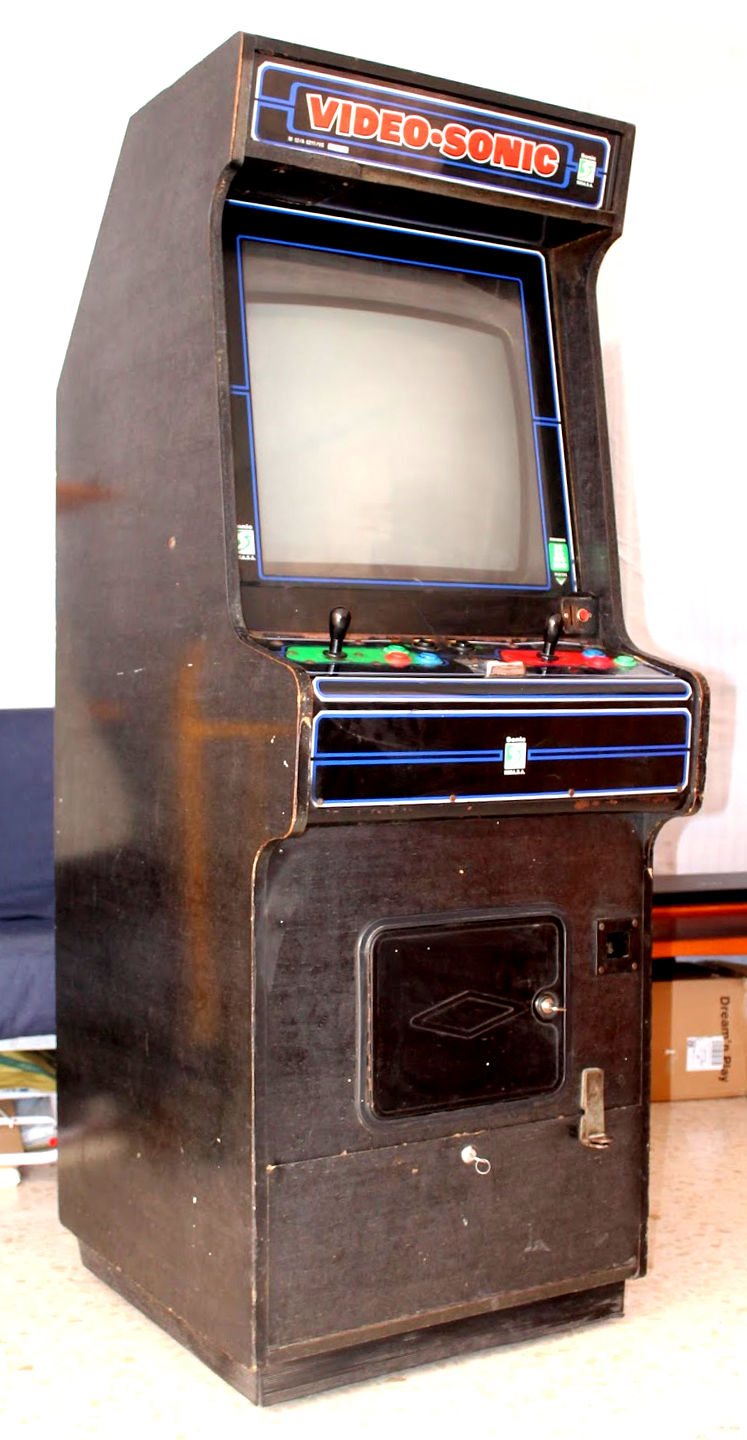
Looking, looking and looking for, I finally found someone who was selling a huge variety of 90s’ amusements from a few kilometers away from home (in Malaga, Spain). After a couple of calls, I finally received photos of what was going to be my starting-point: a functional Video-Sonic with the mythic Tetris.
I couldn’t believe I was seeing on those photos and talking about. But yes! That dusty monster was waiting for me. Now… how could I pick up such huge and heavy thing to bring it home?. Considering costs, patiently I could negotiate and find a van to rent still making the business profitable. My old friend Jesús, a van and the common passion for old tech stuff, was all we needed to go for it.
And finally here it was!
The hard-work and the important decisions were coming… what parts can we re-use? how can we remove all scratches and bumps from the wood? can I replace the rusty metal? CRT or LED? do we keep the original design or customize it?… I was at least sure of a few things:
- LED monitor.
- No coins system.
- Control panel base on a USB interface.
- Minimum number of fans (zero if possible).
- Accesible switcher at the top.
With those requirements, I would build a flexible and easy-to-maintain hardware that would let me add either a PC, console or… as Jesús thought, a lovely Raspberry Pi.
Ok, before gutting the monster I left in the living-room, I wanted to enjoy the original design, buttons and screen with all cigarette burns in the control panel, yellowish image, hits in the front side and cigar smell that made thr experience even closer to those days in the corner of a bar.
Clearing things out
Phase 3 of 16
Seeing the big work I had in front of my eyes, I had to make things as easy as possible, and first decided to fix the wheels, which didn’t roll at all and moving such heavy thing made the work hard, noisy and damaging for the floor. Then, with a moveable monster, I could keep removing everything from inside and cleaning it up.

Clean-up and carpentry work
Phase 4 of 16
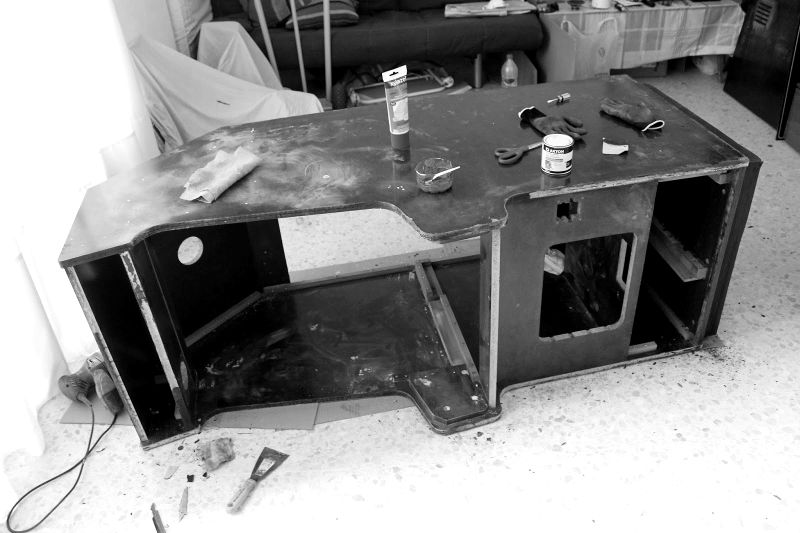
Patience, water and soap. That’s all I needed to clean the cabinet up.
So it was time to polish, putty, fill the gap where coins went out from, remove the surrounding rubber from the bottom of the machine, flip the monster and open another hole to put a second speaker (it’s always preferable stereo sound).
Design
Phase 5 of 16
At this point, everything seemed ready to be painted, sticking vinyl and other nice things but… NO! Still we had to make some tweaks to replace all the broken edge covering band.
Looking for some info on the web, I noticed there were an enormous variety of moldings in the market. After seeing advantages and downsides of every type, I had to make a decision that highly depended on the final cabinet design. So, we only had the skeleton and already had to think of the skin! That’s when I started to think about the design to later decide what molding to use.
Design can be as complex and cool as we want, but costs are considerably important, no?. I found out interesting sites to download classic arcade machine arts or just take some ideas:
- http://vectorlib.free.fr/
- http://www.coinopart.com/
- http://www.ebrevinil.com/?view=15&id_ar=324&id=83
- http://zonaarcade.forumcommunity.net/?t=33858050
- http://forums.shoryuken.com/discussion/137307/the-new-official-arcade-stick-art-thread-no-image-quoting
- http://www.retrovicio.org/categoria/tipo-diseno/arte-imprimir
- http://www.elotrolado.net/wiki/Arcade_Sticks#PLANTILLAS
I played with some “mockups” with the base idea of using black vinyl to cover both sides and low front side, which would reduce costs in printing. Also the fact of putting vinyl was something to do very carefully, with a high risk of not doing it well and keep bubbles the first time . So I looked for a more economic alternative: I would customize the whole cabinet but would use mono-color vinyls, which would not only be cheaper but more elegant.
After many ideas about what design to use considering black as the predominant colour, I finally visualized the cabinet with something very cool that we loved: a Michael Jackson theme based on the Billie Jean song. Remembering colours, that song has always been performed with a staging of Michael with black pants, black jacket (with rhinestones) and black hat. In contrast with a white liner and globe. Then I had material enough to seriously began to work on my own arts.
Marquee

Bezel

Control panel background

Having these cool images ready and seeing that combined with the vinyl, the most highlighted colour was bright black, then I could think again about the molding to use.
T-Molding
Phase 6 of 16
First of all I had to remove the original molding, which was unexisting in most of the border. It was as easy as putting an iron over the molding and remove it as soon as the glue was enough hot.
Molding is a world I was not aware about at all. Variety of models is huge and each one has its advantages and downsides. After checking different models on the web and different stores, I saw I needed a T-molding. A model that requires a small hallow along all the border to inlay it
Now the question was: how could I open the required hallow? There were hundreds of ideas on the Internet, special and hand-made tools… many sophisticated and expensive things that was not worth to buy or build. My idea was simpler and handier than all I saw: A screw inlayed into a piece of cork to mark the guideline and a flathead screwdriver to deepen and open the gap.
Main switcher
Phase 7 of 16

Those days when I used to go to the amusements to see who was able to go further in the Shamurai Shadown or in Snow Bros, I remember all cabinets had a switch on the top side, pretty hidden, but easily reachable. It had two positions (on/off), which had a trick! I have seen it at least in one cabinet: when your credits end up, if you quickly switched from ON to OFF and ON again (kinda reset), you could keep playing with a new credit. It was like your credit counter was not decreased before the machine got off and kept it back when the game got on.
A switch like this has the advantage of being more accessible than the default one, which was in the back side under the main cable.
Paint, vinyls and t-molding
Phase 8 of 16
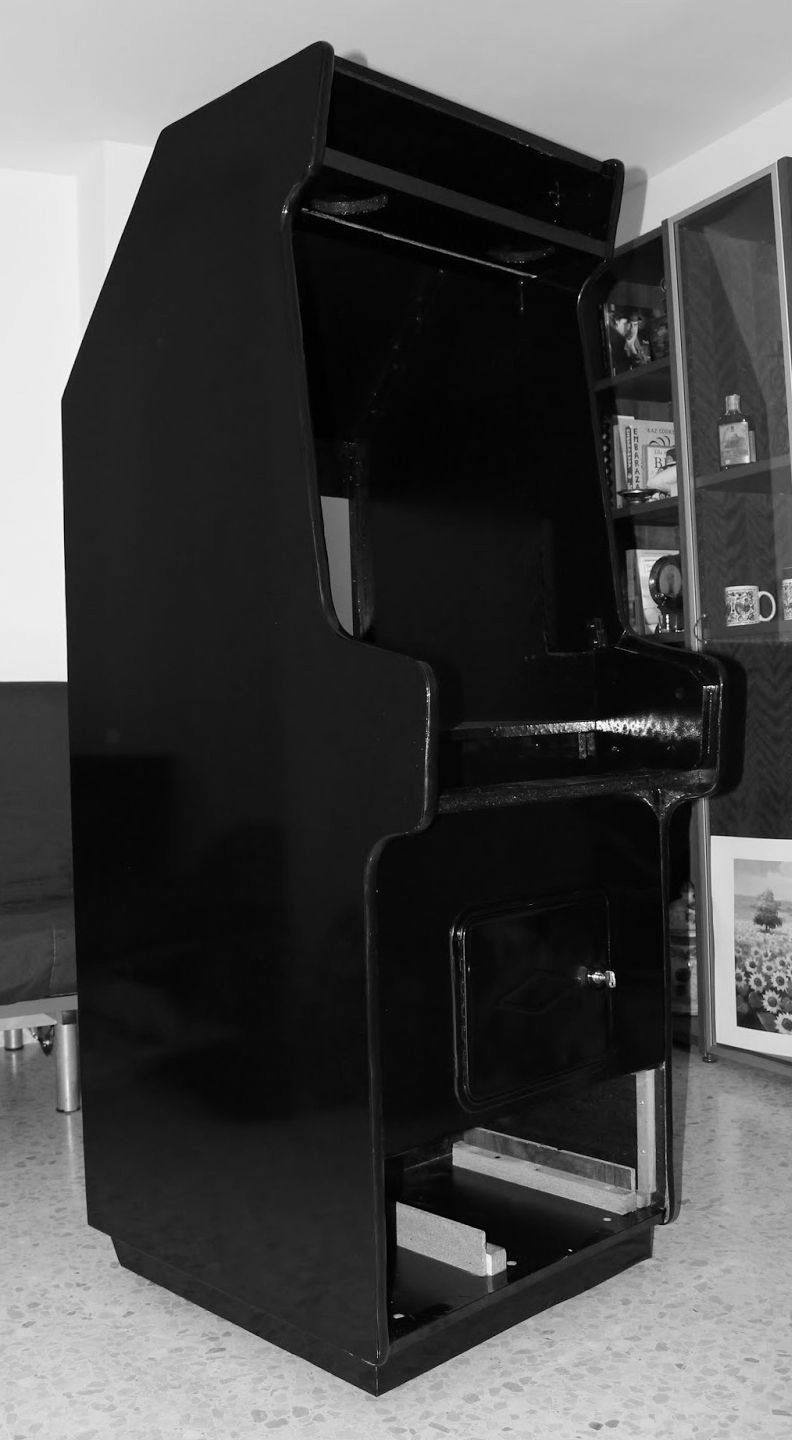
At that moment, we had the guidelines for the t-molding, all wood ready to be covered with vynil and clean to be painted inside, so we were ready to get a sophisticated and modern cabinet.
Front doors
Phase 9 of 16
Metal door needed a clean-up job to remove all oxide and also spray paint.
Finally the bottom door. I had to replace this part with a new board as the original one had big kick signs. I also added an internal magnetic closure to avoid any other visible piece outside.
Control panel
Phase 10 of 16
Seeing the status of the buttons, joysticks, cables or plexiglas, I just decided to create a new control panel only re-using the metal base. However, I wanted more buttons to have a more flexible panel for games from different platforms and this leaded me to also customize the original base.
Steps:
- Remove oxide from the base and painting it with black anti-oxide paint.
- Open holes based on a customized design.
- Cut the plexiglas.
- Bend the plexiglass with a hitting gun and open holes.
- Ensamble joysticks.
- Put black cardboard, the printed Michael Jackson image, plexiglas and buttons.
- Connect all buttons and joysticks to the USB interface.
- Screw the control panel to the cabinet.


Printed plexiglas
Phase 11 of 16
Designs I created in the 6th step of this process, where printed on plexiglas with the sizes I asked. I only needed to print the marquee and bezel, which was important to help me to know the exact position and inclination the monitor should have inside the cabinet.
Speakers
Phase 12 of 16
I used a couple of Pioneer TS-G1022i car speakers, which includes integrated woofers, and a cheap amplifier. More than enough for the stereo sound in such short distance with the players. Really good sound that made the experience much more enjoyable.
Monitor
Phase 13 of 16
Cutting a wood board with the lenght of the internal cabinet’s width. Then drilling four holes in the same position of the monitor back holes to screw it to the table. Also adding four squares to hang the table inside the cabinet.
I recommend to meassure the monitor position and inclination based on the front plexiglas (tedious but more precise given that you will not know the exact position of the empty gap from the bezel until you get it from printer).
I used a 24’’ BenQ GL2460 LED monitor.
Fluorescent light fixture
Phase 14 of 16
In order to keep part of the old arcade cabinet’s aesthetic, I added a bar light behind the marquee.
Raspberry Pi
Phase 15 of 16
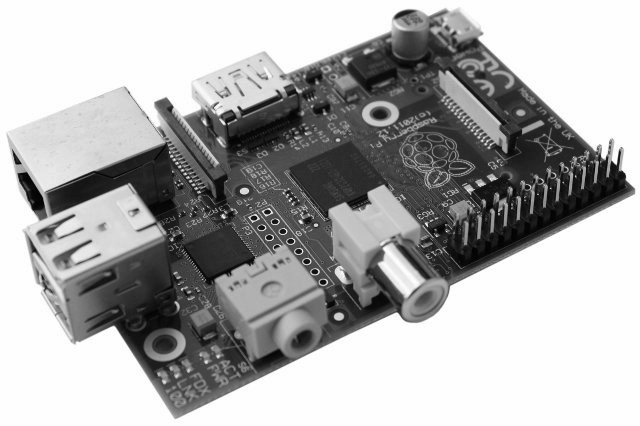
No fans, no PC power supplier, no hard drive… minimum hardware for just what I wanted: an interface with a list of arcade games to play with. At the moment, in this sense, the best alternative to the usual motherboard, graphic card, hard drive and all that hardware is a Raspberry Pi. I used the model B with 512 MB and ARM1176JZ-F processor. Also a Kingston SD 16 GB card for the emulators and games.
Lukily some pleople have already worked on emulators ready to run on such hardware and, after comparing multiple platforms, I could finally chose one: Raspicade.
![]()
Raspicade is a clean Debian OS configured to automatically run a very user-friendly interface to play with roms of multiple emulator platforms when booting.
By default it supports MAME and Megadrive roms, but the game lists were very limited. And that is when I had to find out how and what compatible games (roms) could be added to those lists. Or at least to MAME’s.
I recommend roms that have been compiled to run on Android OSs. There are tons of pages to download them, but getting a package with a full set of functional games is not so easy. This website might help: Mame4Droid.com
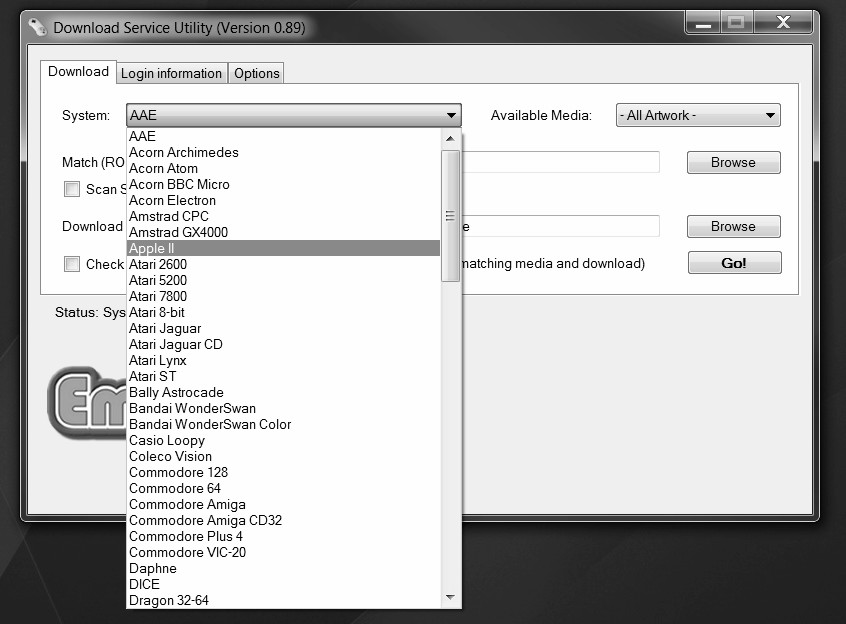
Once you have the rom set in the expected Mame directory, it is good to have a screenshot associated to each game. That makes the searching experience easier and attractive. The most popular tool to automatically download screenshots and other images for different platform games is EmuMovies DSU (for Windows). A very intuitive and powerful application based on the connection to a service that provides all requested files.
Having the rom and image files, we still need to get the official game name of each one plus tell Mame how they relate: rom file, image file and game name. In order to do it, there is a magic Perl script called mameGenXml that makes all the work by running it from the command line.
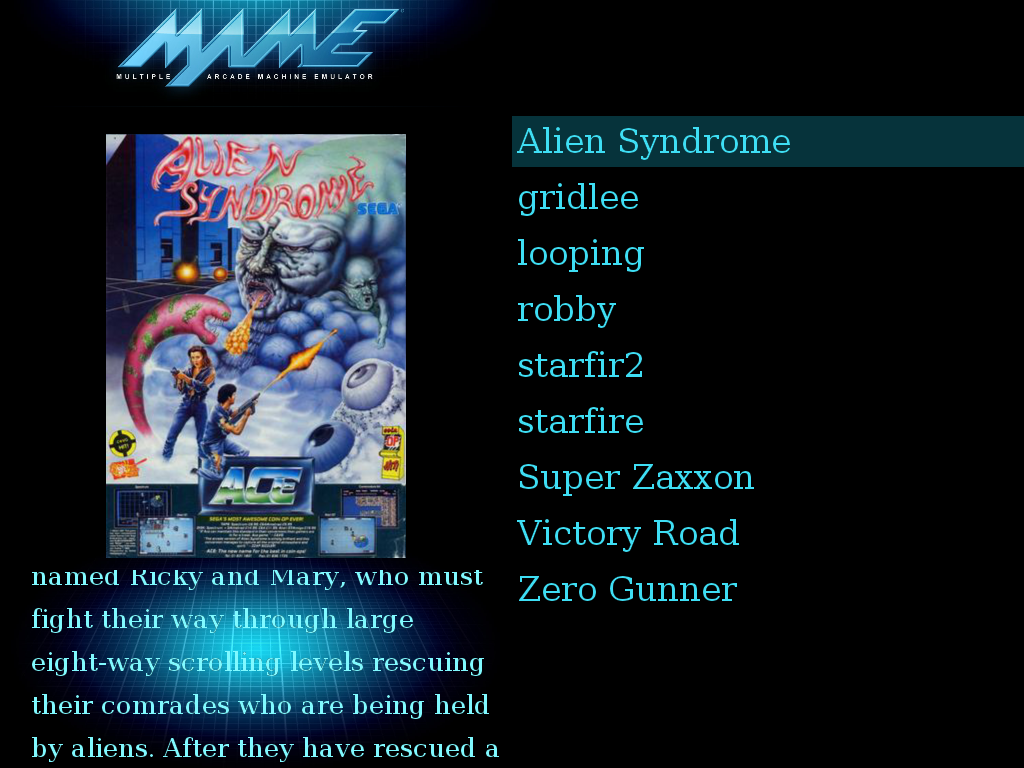
This is an example of how the Raspicade Mame interface look when we have a few roms with the corresponding image:
See Raspicade docs to know how to configure the control panel and shortcuts for the Mame interface.
Power strip
Phase 16 of 16
Having the monitor, sound amplifier, Raspberry Pi and fluorescent light fixture, I just needed something that powered on all components at the same time when switching on the external switcher I added. And that was a simple power strip (where everything was plugged) that I opened and modified to be controlled from the main switcher.
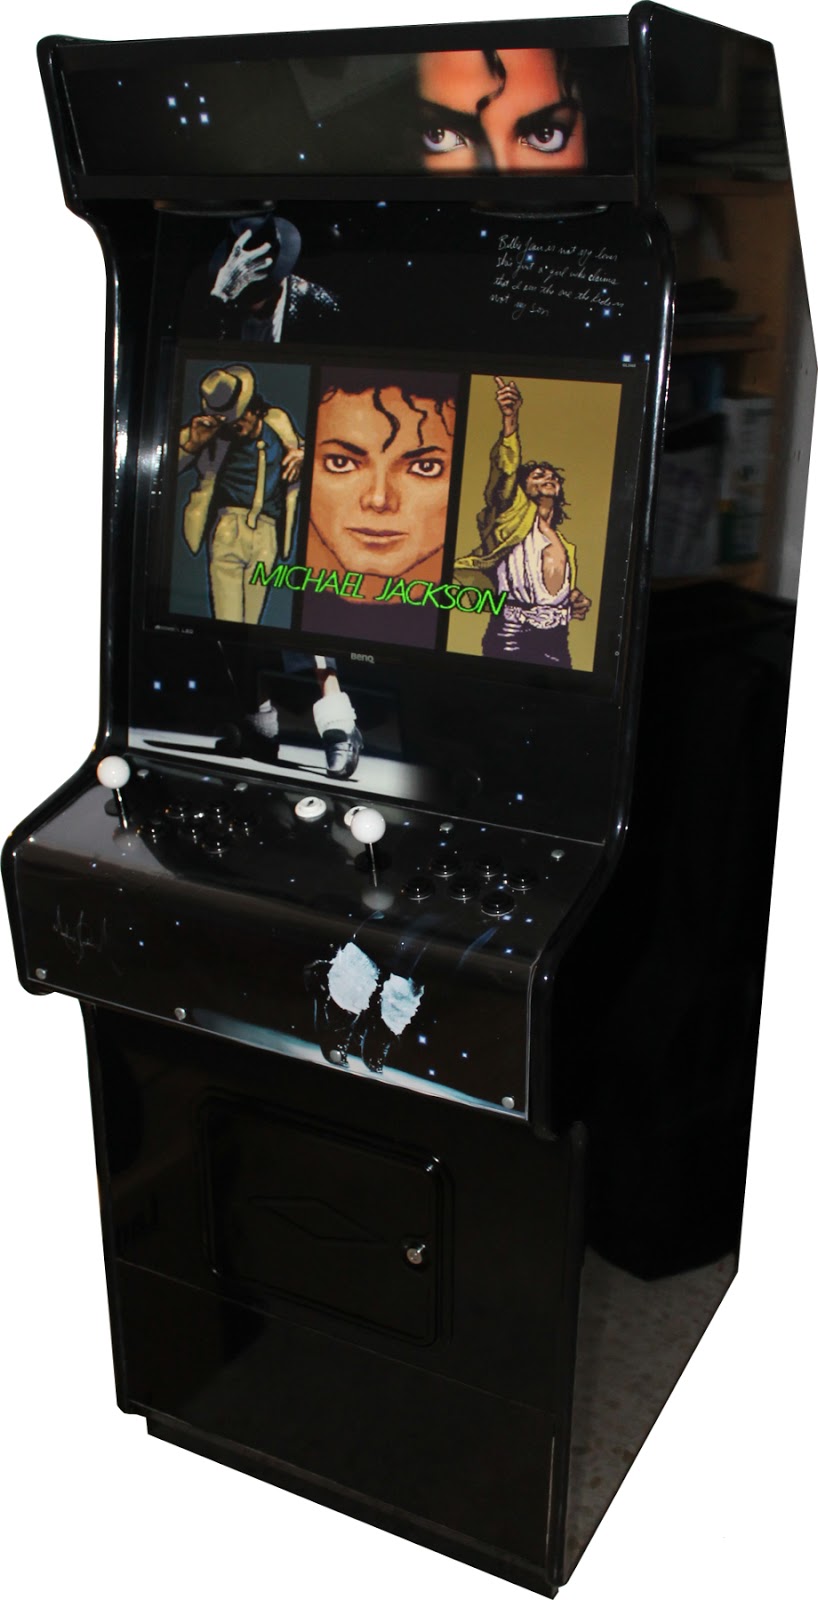
Fun!
Fast booting with the lovely classic switch button, an intuitive Mame interface with all controlled from the control panel, a big screen displaying colourfully old games such as Sunset Riders or Captain Commando, japanese joysticks and american buttons that even simulates coin insertions, SSH connection to the system… all good and ready to make the classic games parties an easy and confortable experience.
Before and after
Jul 2013 vs Sep 2014


More, more and more photos
I hope you found it interesting :)